Task View
Tasks are individual items that can be prioritized and selected to reoccur based on due dates. To create tasks and assign them to specific members of a workspace, use the Project Management tab drop-down and click Tasks & Milestones.
Learn about:
Creating tasks
Creating tasks via email
Working with tasks
Task List View
Task detailed view
Task dependencies
Attached and Related Files
Bulk Edit Custom Properties
Creating tasks
Tasks can be created when viewing any task list via the task entry form. To create new tasks:
- Type the task in the "Create New Task" entry field
- Click Add to add the task or More options to add additional details like:
- Title
- Start/Due Date
- Assignee - to assign the task to workspace members.
- Budgeted Time - to allot a specific amount of time for the task.
- CC - to copy workspace members on the task.
- Priority - to give the task a priority of high, medium, low, or none.
- Recurring - to set a time interval for task recurrence. Note: the next occurrence of a recurring task will be created once the current task is completed.
- Tags - to assign keywords to categorize tasks or improve search results.
- Reminders - to send email notifications to assignees prior to the task due date.
- This Task depends on - to designate the task as dependent upon another task. The start dates for dependent tasks will shift if you edit the start date of the preceding task. If you only edit the due date of the preceding task, then only the due date of the dependent tasks will shift.
- Description
- Notify via Email - to send email notifications to assignees and CCs about the creation of the task or edit of the task details. Note: the member creating or editing the task will not receive an email notification even if assigned to the task or listed as a CC.
- Click Create
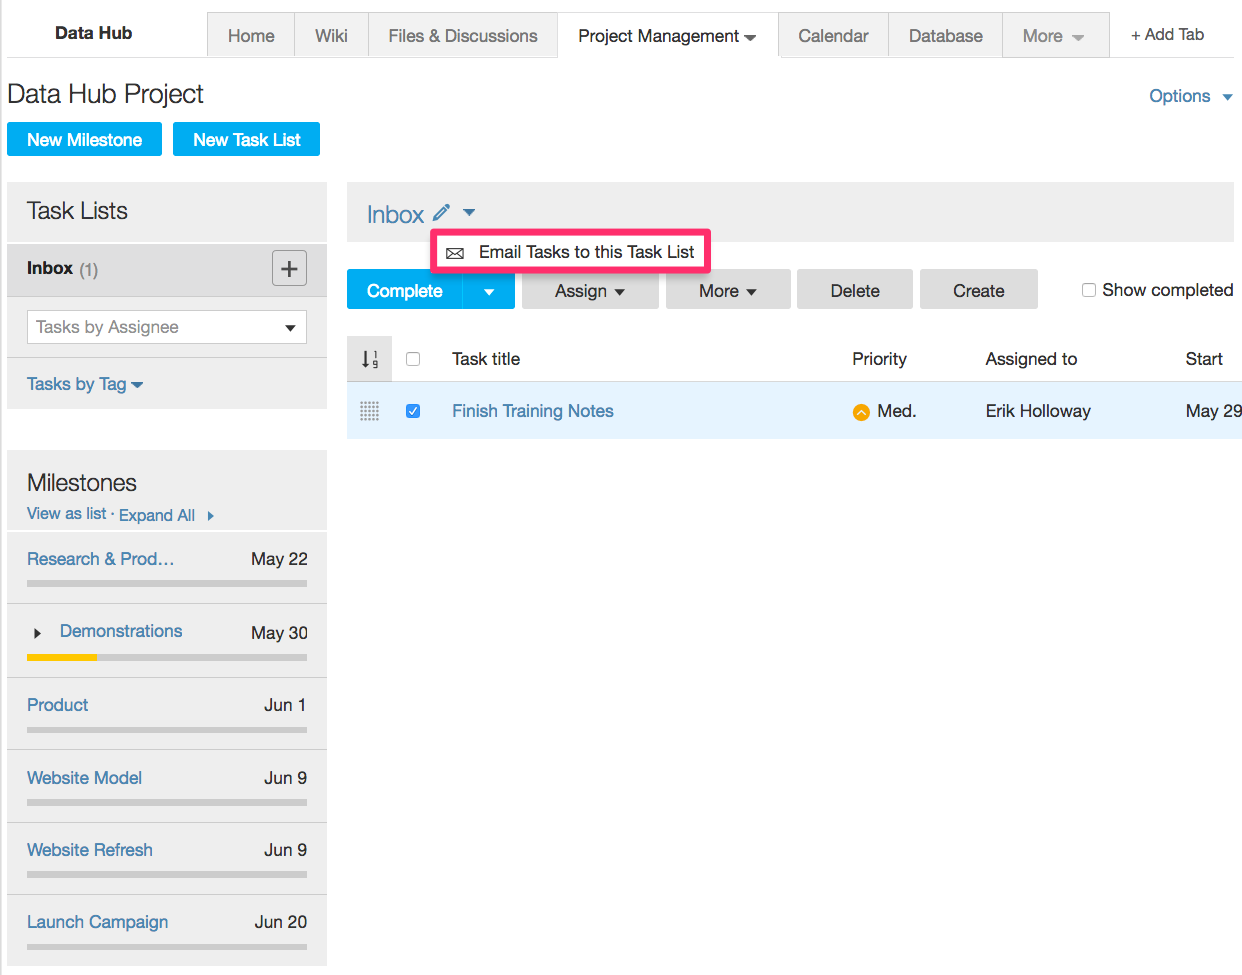
Creating tasks via email
To create tasks via email select the tasks list drop down menu and then click Email Tasks to this Task List
Email in a task should follow these guidelines:

A task assigned to John and Mary due on April 20, 2016 would contain the following information:

When using the email-in Tasks feature, any members with the same first name within the workspace will be assigned the Tasks. (e.g. John Smith and John Doe will be assigned a Tasks that is emailed-in)
Working with tasks
View and Sort Tasks
To view the tasks associated with a specific task list, click the task list title. By default, tasks are sorted by priority. Tasks can also be manually sorted by priority, title, assignee, start date, due date, and time spent or any other column in the task list view by clicking on the field headers.
Changing the status on a task
Change the status of a task by checking the box to the left of the task title and then select the drop down arrow to mark the task as "To-Do", "In-Progress", or "Completed"

When a task is marked complete, it is crossed out and hidden by default. Completed tasks can be viewed by selecting the "Show Completed" option on the page.

Completed tasks can be reopened to a "To-Do" status by selecting the checkbox next to the task and then selecting "Reopen".

Click-to-Edit Tasks
Quickly edit task details from the task list view using click-to-edit. To click-to-edit a task, hover your cursor over the column you want to edit until you see the edit icon appear, double click your cursor, and make your changes.
Only workspace members with "Edit" permissions will be able to click-to-edit tasks.
Changes made via Click-to-Edit will not trigger an email notification to subscribers.
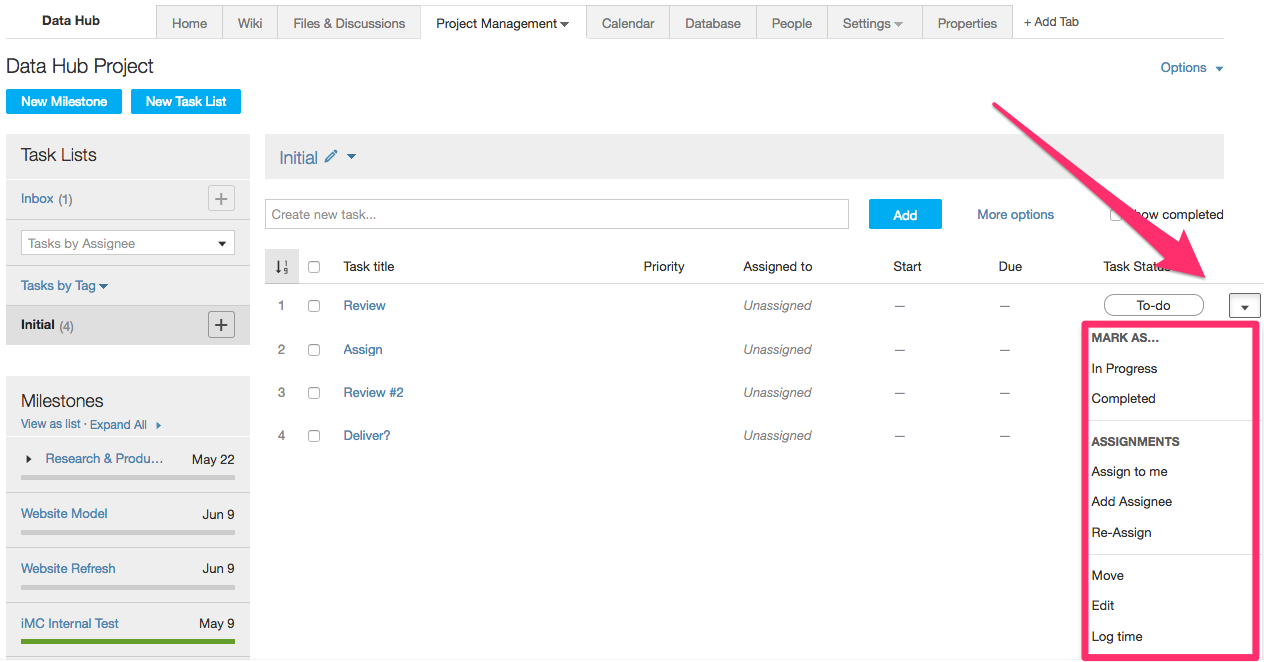
Task actions in list view
When viewing tasks in List View, users have the ability to perform the following actions:
- Mark as: To-Do, In Progress, Completed
- Assign to me (take over assignment of the task)
- Add assignee (add someone else as an assignee or assign a Member group)
- Re-assign (remove assignees and add someone else)
- Move the task (move to another task list or workspace)
- Shift the dates (business or calendar days)
- Edit the task
- Log time on the task
- Delete the task
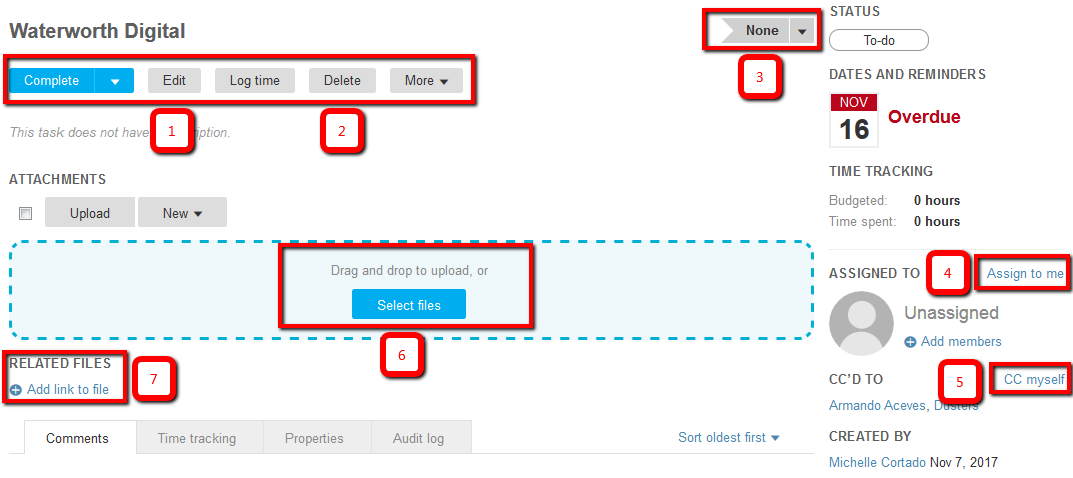
Task actions in detailed view
Selecting a task in List View takes you to the Detailed View. In this view, users can complete tasks, add or read comments, view the Time Tracking and Audit Log, or perform the following actions:
- Edit the task title, description, assignees, due date, etc.
- Delete the task. (This action can be undone)
- Change the priority of the task.
- Assign a task to yourself with one click, regardless of current assignees
- CC myself on all changes to this task
- Attach files by either selecting from a folder on your computer or dragging and dropping it into the attachments field.
- Add a link to a file that is already stored in the workspace.
Assignees: You can assign a task to yourself, another member of the workspace or a member group. If roles are enabled in the workspace it is also possible to assign a Role to the task.
When you choose to "Add link to file", a dialogue box will open that will let you select a file that is already being hosted in your workspace.

By selecting More, you can:
- Move the task to another task list or workspace.
- Email a comment into the task.
- Display and copy the task Permalink.

How to Undo an action made on a task
After an action is made on a task in the task list view, a message stating the task action will display. To undo the action action select "Undo".

Email notification upon changing task assignee
The "Notify Assignee" check box will automatically check when the task assignee (s) or CC(s) is changed. This option will let the new assignee(s) and CC(s) know the task has been assigned or CC'd to them upon updating. This option can be toggled off in the case a user does not want to notify the new assignee(s) or CC(s).

Task dependencies
Tasks can be linked to other tasks that are in different task lists and/or milestones. When tasks are linked, one task is considered the predecessor and the other is considered the dependent task. This allows dates of the dependent task to shift accordingly if dates for the predecessor are changed.
To set a task as dependent on another task, click on a task's name in any task list view to see the details of the task. Next, click on the "Edit" button to edit the task.
From the edit view, locate the "Depends on" field (in the "Show additional options" section) and begin typing the name of the predecessor task. Tasks that match the input will appear in a list below along with the name of the Task List to which they belong. Click on the task name to set it as the predecessor. Click Update to save changes.

When editing the start or due date for a predecessor task, the user will be prompted whether the date(s) change should shift dependent tasks. To shift dependent tasks, click the check box and select whether to shift the dates by either calendar days or business days. Click Update to save changes.

Attached & Related Files
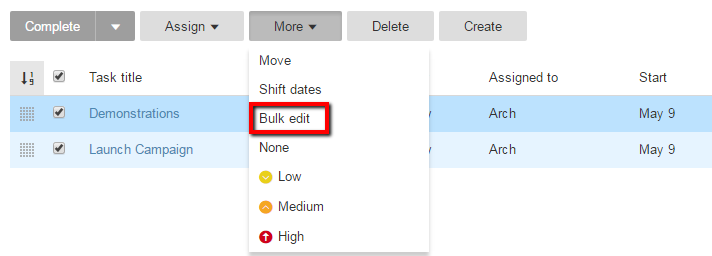
Bulk Edit Custom Properties