Note: You must be a Workspace Administrator to share a folder. This feature is not available for our free plan.
Shared folders give you the ability to share a single folder across multiple workspaces, reducing the need to upload redundant content to numerous workspaces. Files can be stored in one workspace and viewed or edited in other workspaces by sharing the parent folder. All of the contents of a shared folder will be visible in the destination workspace.
Please note that you may only move and delete files and folders within the original workspace.
Uses include:
- Master documentation (templates) shared with all your client workspaces or extranets
- Creating group specific workspaces and still store all your content in one workspace (ie. contract management, accounting audits, department level document management, etc.)
- Sharing news with another community of members
Learn about:
Sharing a folder with another workspace
Share settings
Editing an existing folder share
Sharing a folder with another workspace
To share a folder to another workspace:
- Navigate to the folder you wish to share and click on the edit pencil icon next to the folder name.
- Select Share Folder
- Select the destination workspace and folder as well as the permission options
- Click the Share button. The sharing details will appear in a list below the options.

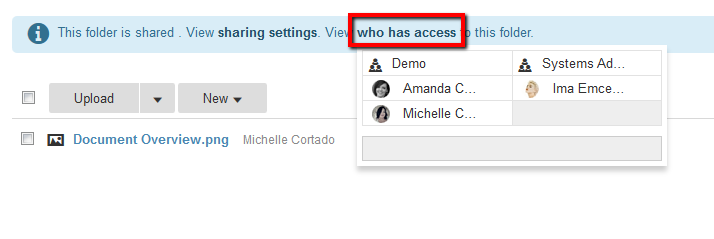
A message will appear at the top of the folder view to indicate that it is shared with other workspaces. Shared folders in the folder list are represented with an icon so you can easily determine which folders are being shared. asd

Sharing settings
The following settings are available when sharing folders across workspaces:
- Let users make changes to files inside this folder
- Let users see members and comments from other workspaces
Editing an existing folder share
Administrators can edit the permissions and properties of existing shared folders. To modify an existing shared folder, navigate to the folder, click on the edit pencil icon next to the folder name, and select Share Folder.
To remove the share, click on the trash icon to the right of the folder in the Shared With menu.
Who had access

When you select "who has access" this shows users who have access from the parent workspace. To grant new users access to this folder you will need to add them in the People tab as members of the workspace. All members of the workspace where the folder is shared have access to the files within the folder.
